How To Make Images Smaller Without Ruining Them
Three TGK images, three different export decisions. Our Squoosh guide shows which settings preserve faces, readable text and transparent edges.

A 1 MB upload limit shouldn't mean turning a face into wax or making a screenshot hard to read, so we ran three images from our own files through Squoosh: a photorealistic AI still, a screenshot of TGK and a transparent illustration. All three finished well below 1 MB without losing any dimensions, and two of them kept exactly the same pixels.
Quick Answer
Start photographs at WebP quality 80 and check the detail before you download, while screenshots and transparent graphics are safer as lossless WebP, which keeps every pixel of the original. Before exporting anything, check which formats the upload form accepts, because a tiny WebP file won't help if the form only takes JPEG or PNG.
How To Compress an Image in Squoosh
Squoosh is a free tool that compresses images on your own device, and its official documentation says the images are never sent to a server, although the app does collect basic usage analytics.
- Open a copy of your image. Keep the original for future edits. If you're still fixing colour or cropping, finish that in your photo editor first.
- Choose the format on the right. Select WebP for these examples. If you need JPEG, choose MozJPEG; for a smaller PNG, try OxiPNG.
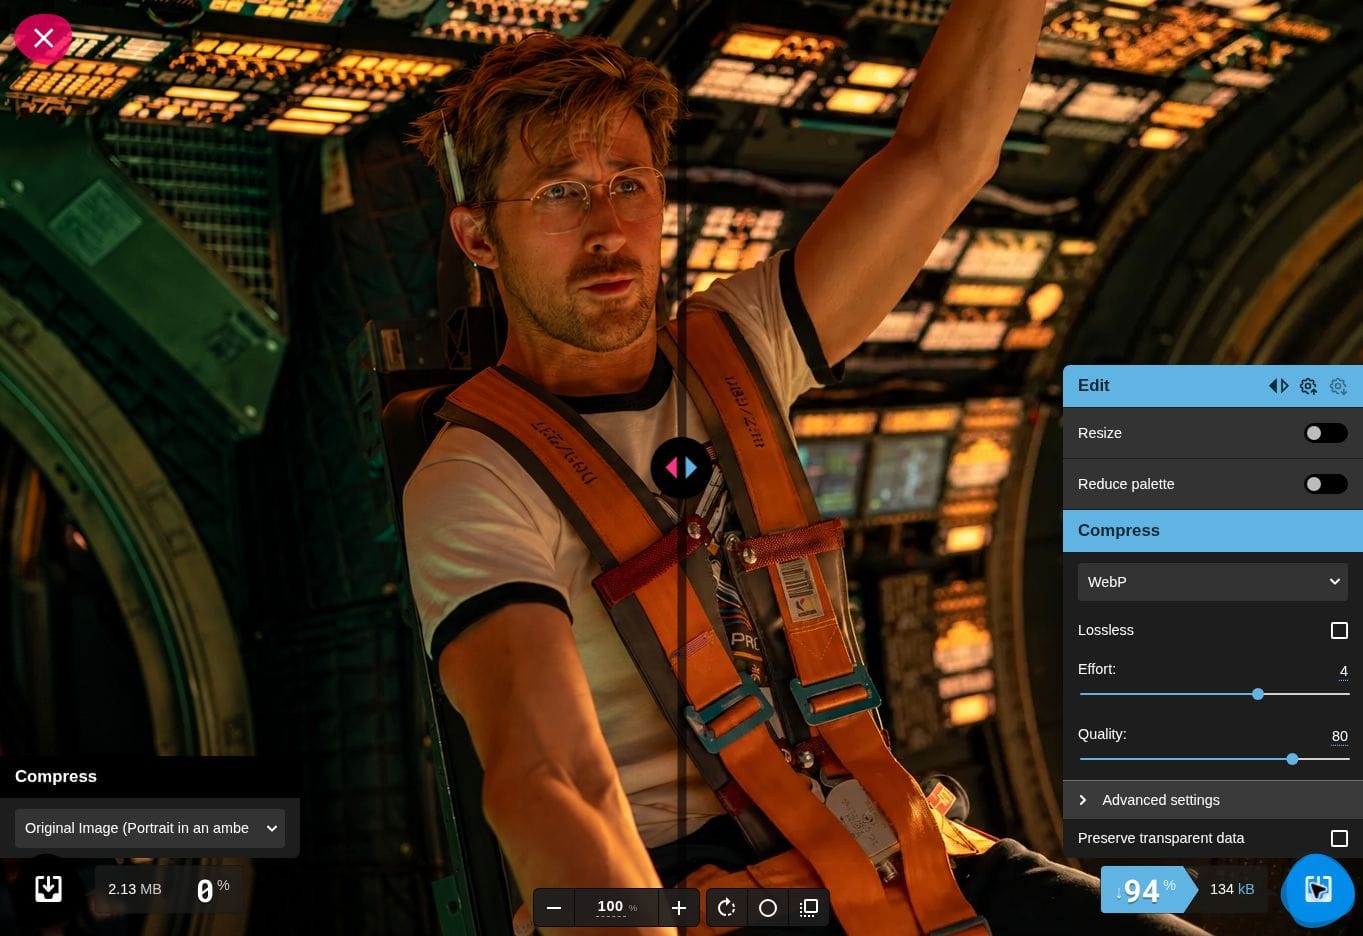
- Set the compression. For a photo, leave Lossless off and start at Quality 80. For text or transparent artwork, switch Lossless on and leave Slight loss at 0. Keep Resize and Reduce palette off to begin with.
- Inspect, then download. Wait for the file size to settle, move the comparison divider and zoom to 100%. Check faces, small lettering and edges before using the download button on the right.
Treat Quality 80 as a starting point to adjust from, because it doesn't mean the image keeps 80% of its quality, and the same number in another format can give a different result.
What Happened to Our Three Images
These are the measured file sizes of the downloaded exports, all at their original dimensions.
| Image | Original → Export | Reduction |
|---|---|---|
| Photo-style AI still | 2.13 MB → 134 kB | 93.7% |
| TGK screenshot | 1.50 MB → 571 kB | 61.9% |
| Transparent illustration | 337 kB → 95.5 kB | 71.7% |
Photos: Watch the Face, Not Just the File Size
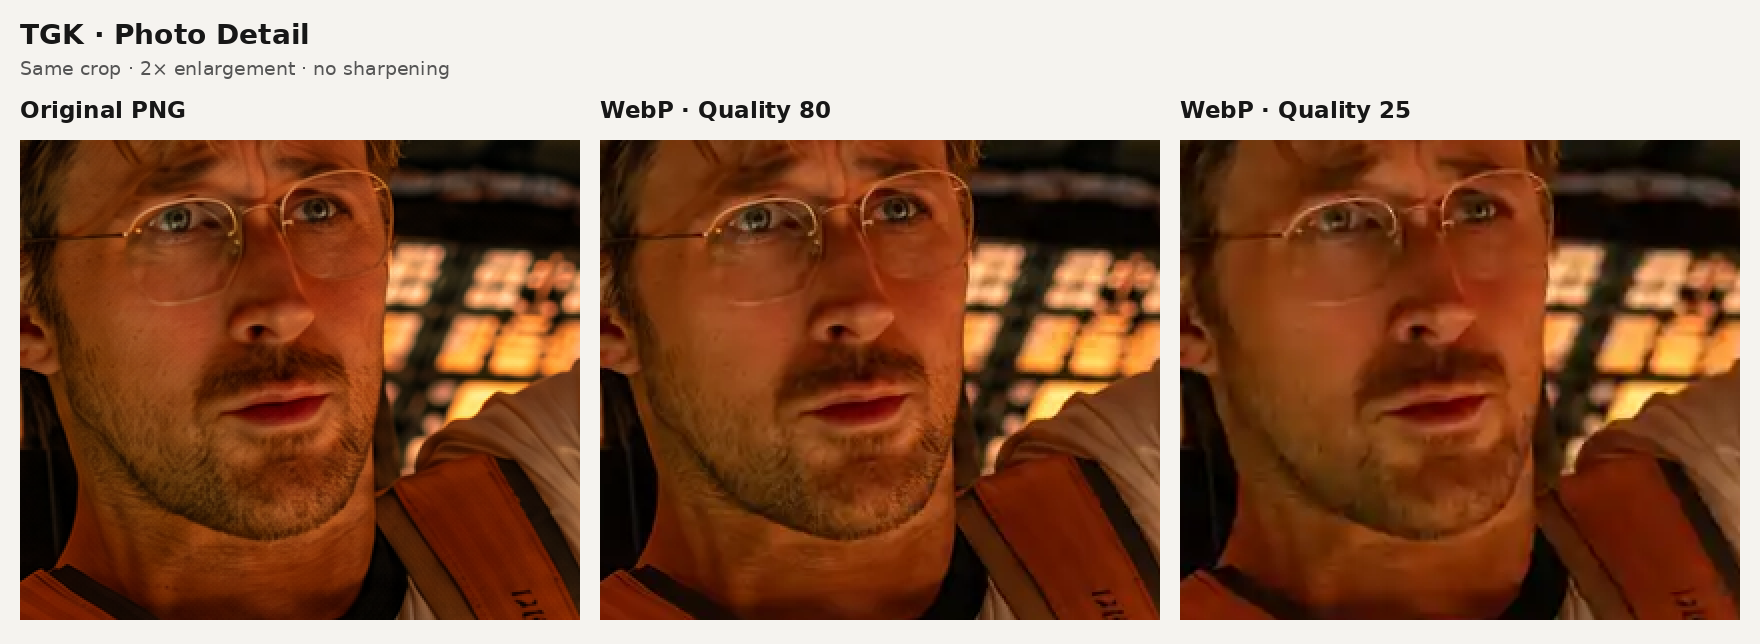
At Quality 80 and Effort 4, our 1586 × 992 image became a 134 kB WebP with the eyes and glasses still clear, although the enlarged crop shows some smoothing in the skin and beard.
Dropping to Quality 25 brought it down to 56.7 kB, with much rougher patches across the face and less definition around the mouth, which is a hard saving to justify for a portrait. A product photo deserves the same close look at fine print, stitching and surface texture.
Screenshots: Protect the Small Text
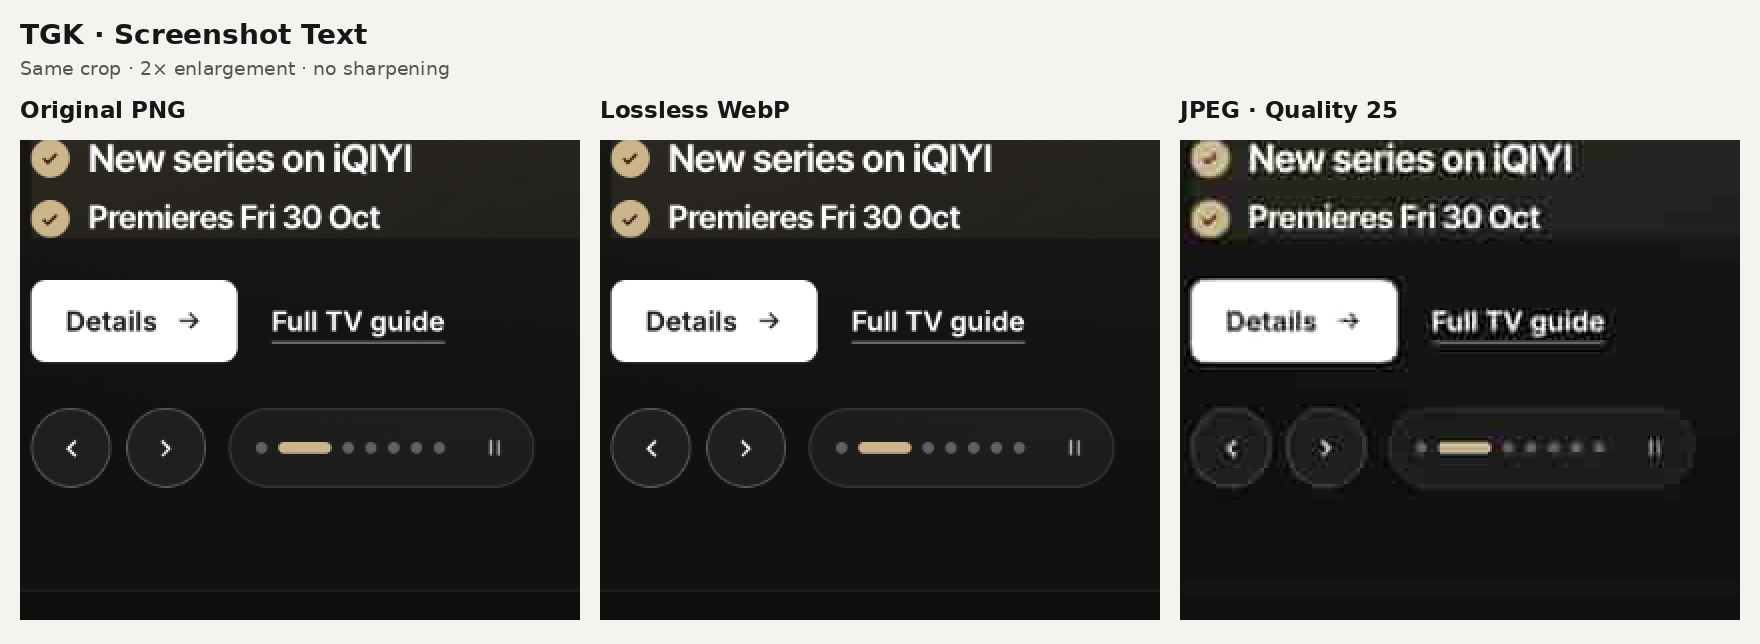
For the 2048 × 1280 screenshot, we selected WebP, enabled Lossless and left Effort at 6 and Slight loss at 0. The result was 571 kB, and a pixel comparison confirmed it matched the original exactly.
When we pushed a MozJPEG export down to Quality 25 for comparison, it reached 43.7 kB and the text stayed readable, but white lettering picked up dirty edges and the thin outlines around buttons broke up. For a screenshot someone needs to follow, we'd keep the lossless version.
Transparent Images: Keep the Background Transparent
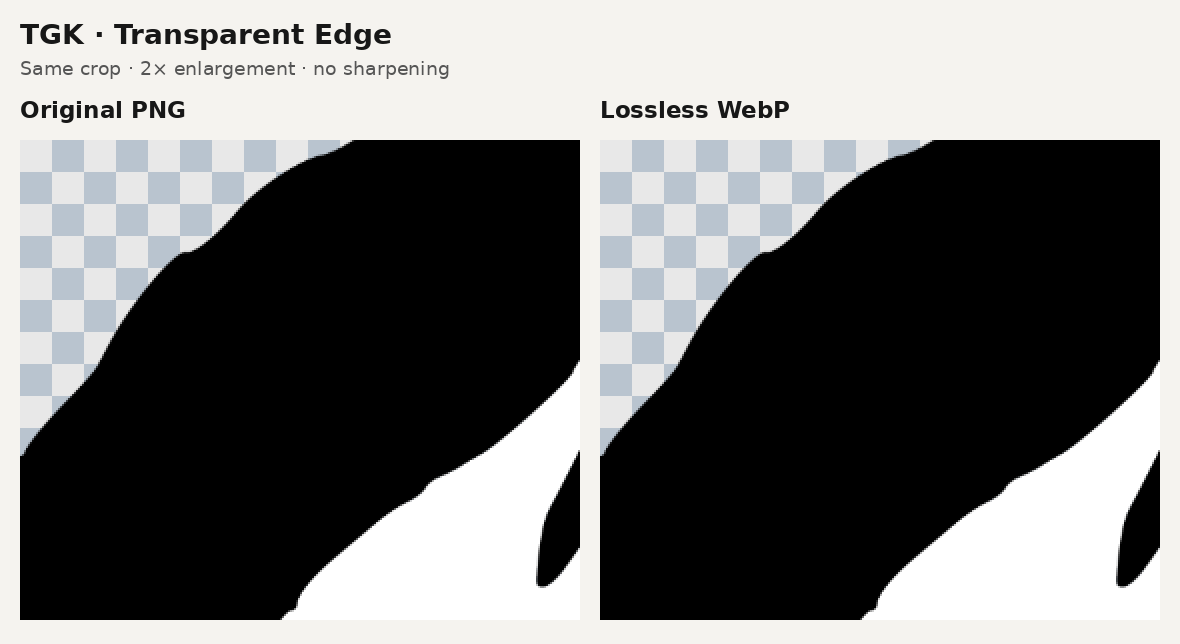
With lossless WebP, Effort 6, Slight loss 0 and Preserve transparent data switched on, the 1790 × 2048 illustration went from 337 kB to 95.5 kB, and both its colour and transparency values matched the original pixel for pixel.
WebP supports transparency and so does PNG, but JPEG doesn't, so exporting a cutout as JPEG gives it a solid background. Check your export against both a light and a dark background to catch unwanted borders.
Still Above the Upload Limit?
Reducing dimensions removes pixels, while compression only changes how the image is stored. A 4000-pixel-wide photograph may be far larger than a small website card needs, but shrinking a screenshot can make its instructions harder to read.
Start by cropping out empty space in your editor, and if the image is still bigger than its destination needs, enable Resize in Squoosh, reduce the width with the proportions locked and compare the result at the size people will actually see it. If faces or lettering are already starting to break down, lowering Quality again is the wrong fix.
For a website, decide where each image will appear before exporting and add those requirements to the content plan in our business-website planning guide, so a thumbnail and a full-width feature image don't end up with the same oversized file.
Final Verdict
Even with a 200 kB upload limit, our Quality 80 photo already fits, and dropping it to Quality 25 only saves another 78 kB while giving up facial detail for no practical benefit. Once an image meets the requirement, we'd keep the cleaner version.
FAQ
What is the best format to make an image smaller?
For photos, WebP at around quality 80 usually gives the best balance of size and detail. For screenshots and transparent graphics, lossless WebP keeps every pixel and still cut our files by 62% to 72%.
Does compressing an image reduce its quality?
Lossy compression does, especially at low quality settings, which is why our Quality 25 photo looked rough around the face. Lossless compression keeps the image identical and only stores it more efficiently.
Is Squoosh safe to use?
Squoosh processes images in your browser, and its documentation says they are not uploaded to a server, although the app collects basic usage analytics.
Sources
TGK
- Original compression files and measurements: the downloadable example pack accompanying this guide.
- 5 Best Free Photo Editing Apps Without a Subscription
- 6 Things to Plan Before Building a Business Website With AI
Official Documentation
- Squoosh and its privacy documentation, checked 30 October 2026
- Google: WebP Frequently Asked Questions, for lossless compression and transparency support
- MDN: Image File Type and Format Guide, for JPEG, PNG and WebP format capabilities